Инструкция
HTML-файл является обычным текстовым документом, в котором с помощью специальных дескрипторов задается расположение элементов контента относительно друг друга или окна браузера. Просмотреть работу файла можно через интернет-обозреватель. Чтобы отредактировать код HTML, можно воспользоваться текстовым редактором или подобрать специальные программы, имеющие такие функции, как автоматический ввод и подсветка синтаксиса. Примером приложения, хорошо подходящего для удобной работы с подобными документами, является Sublime Text 2.
При использовании редактора кода в главном меню программы выберите пункт File («Файл») - Save As... («Сохранить как...»). В открывшемся диалоговом окне вам понадобится указать директорию для сохранения файла, а также имя и расширение. Можно сконвертировать текстовый документ в HTML-страницу, дописав в конце имени расширение html.
Существует ряд ситуаций, когда даже правильно созданный файл с верным расширением не открывается в браузере. Причиной тому является неправильное оформление структуры кода HTML. Существует ряд обязательных правил, без соблюдения которых интернет-страница отображается некорректно, либо вовсе не открывается.
Тег хоть и не является обязательным, но его наличие помогает браузеру правильно интерпретировать код и распознать структуру документа. Иногда причиной некорректного отображения веб-страницы является именно отсутствие или неправильное написание этого тега.
Парный является дескриптором, в который заключается все содержимое веб-страницы. Элементы кода, которые находятся за пределами этого тега, отображаются как обычный текст или блокируются браузером, за исключением . Дескриптор является обязательным и не может быть использован на странице более одного раза.
При помощи указывается основная информация о документе. Между этими тегами с помощью дескрипторов задается заголовок веб-страницы, а посредством подключаются файлы CSS или JavaScript. Таким же образом внутри парного тега указываются стили, кодировка, тип документа, версии оформления для разных браузеров или устройств и некоторые другие параметры. Содержимое тега не отображается в окне браузера, однако дескриптор является обязательным.
Между тегами и заключено тело сайта - информация, которая выводится на экран пользователя. Это могут быть заголовки, подзаголовки, параграфы и строки текста, изображения, видео или другие объекты мультимедиа. Дескриптор является обязательным. Кроме того, внутри него могут быть использованы другие элементы , или . Они не влияют на отображаемый результат, но создают структуру HTML-кода, что считается хорошим тоном в кругах web-разработчиков или верстальщиков.
Думается, что вы хорошо знакомы с языком HTML, и вам известно, что такое теги, и какую роль они играют в HTML-документе. Если что-то не ясно, можно посмотреть . По отношению к тегу meta следует помнить следующее: во-первых, - все мета-теги пишутся в , во-вторых, - они должны располагаться после и в-третьих, - не парные элементы и их не нужно закрывать.
Теперь давайте подробнее взглянем на эти мета-теги. Следует заметить, что в этой статье мета-теги описываются в порядке уменьшения важности. Считается, что при создании сайтов последовательность расположения мета-тегов в коде HTML страницы не имеет никакого значение, однако даже если это и так, то расположив их в том же порядке, как они описываются в данной статье вы ничего не потеряете, а может быть и выиграете. Итак, приступим.
Description
Это очень важный мета-тег. То, что указано в атрибуте content будет показано на странице с поисковыми результатами многих поисковых систем. И поэтому если конечному пользователю не понравится описание, то он не заинтересуется вашим сайтом.
Keywords
Важный мета-тег. Хотя в последнее время его значимость падает, некоторые поисковые системы до сих пор именно из данного тега извлекают информацию о вашем веб-сайте. Отбирать ключевые слова и фразы следует после проведения соответствующих исследований. Это могут быть поисковые проверки, специальные сервисы поисковых систем и получение ключевых слов из специальных списков, которые распространяются бесплатно и найти их будет совсем не трудно. При написании ключевых слов главное не перестараться, иначе, если повторов ключевых слов и фраз будет слишком много, поисковики сочтут это за поисковый спам и забанят ваш сайт. При составлении ключевых слов старайтесь не превышать планку в 500-800 символов.
Abstract
Бытует множество противоречивых мнений о важности этого мета-тега и целесообразности его использования. Как вариант, можно скопировать содержимое тега description, немного изменив его.
Robots
Весьма важный мета-тег, который информирует робота поисковых систем о том, как следует поступать с данной веб-страницей и со всеми страницами, на которые с нее есть ссылки. В качестве значения в атрибуте content используются следующие директивы:
При этом можно указывать одновременно две директивы, разделяя их запятой (например, noindex,nofollow).
Subject
Этот мета-тег предназначен для того, чтобы задавать тип данных, представленных на этой веб-странице. По идее, основываясь на данном описании, робот поисковиков должен поместить вашу веб-страницу в ту или иную категорию. К большому сожалению, каждый поисковик имеет собственно разработанную систему классификации веб-страниц.
Page-type
Назначение этого мета-тега полностью совпадает с назначением предыдущего мета-тега, поэтому будет разумно ввести здесь те же термины.
Title и Page-topic
Оба эти мета-тега аналогичны, поэтому и описываются в одном разделе. Здесь все вполне ясно из синтаксиса этих мета-тегов. Можно рекомендовать скопировать текст из и поместить его в атрибуте content.
Revisit
Если информация на вашем сайте часто обновляется, то этот мета-тег очень важен для вас. Он информирует роботов поисковых систем, через сколько дней им следует переиндексировать данную веб-страницу. Существует альтернативный мета-тег – revisit-after, который полностью идентичен данному мета-тегу, однако используется реже.
Пожалуй, это все основные мета-теги, позволяющие описать веб-страницу. Хотя существует множество других атрибутов и значений для тега meta, но их предназначение не относится к данной статье.
There is no real code in the discussion because we haven"t yet chosen a web framework to use to write our code! This discussion is however still very relevant, because the described behaviour must be implemented by your server-side code, irrespective of which programming language or web framework you select.
Web servers and HTTP (a primer)Web browsers communicate with using the H yperT extT ransfer P rotocol (HTTP). When you click a link on a web page, submit a form, or run a search, the browser sends an HTTP Request to the server.
This request includes:
Web servers wait for client request messages, process them when they arrive, and reply to the web browser with an HTTP Response message. The response contains an HTTP Response status code indicating whether or not the request succeeded (e.g. " 200 OK " for success, " 404 Not Found " if the resource cannot be found, " 403 Forbidden " if the user isn"t authorised to see the resource, etc). The body of a successful response to a GET request would contain the requested resource.
When an HTML page is returned it is rendered by the web browser. As part of processing the browser may discover links to other resources (e.g. an HTML page usually references JavaScript and CSS pages), and will send separate HTTP Requests to download these files.
Both static and dynamic websites (discussed in the following sections) use exactly the same communication protocol/patterns.
GET request/response exampleYou can make a simple GET request by clicking on a link or searching on a site (like a search engine homepage). For example, the HTTP request that is sent when you perform a search on MDN for the term "client server overview" will look a lot like the text shown below (it will not be identical because parts of the message depend on your browser/setup).
The requestEach line of the request contains information about it. The first part is called the header , and contains useful information about the request, in the same way that an HTML head contains useful information about an HTML document (but not the actual content itself, which is in the body):
GET https://сайт/en-US/search?q=client+server+overview&topic=apps&topic=html&topic=css&topic=js&topic=api&topic=webdev HTTP/1.1 Host: сайт Connection: keep-alive Pragma: no-cache Cache-Control: no-cache Upgrade-Insecure-Requests: 1 User-Agent: Mozilla/5.0 (Windows NT 10.0; WOW64) AppleWebKit/537.36 (KHTML, like Gecko) Chrome/52.0.2743.116 Safari/537.36 Accept: text/html,application/xhtml+xml,application/xml;q=0.9,image/webp,*/*;q=0..7,*;q=0.7 Accept-Language: en-US,en;q=0.8,es;q=0.6 Cookie: sessionid=6ynxs23n521lu21b1t136rhbv7ezngie; csrftoken=zIPUJsAZv6pcgCBJSCj1zU6pQZbfMUAT; dwf_section_edit=False; dwf_sg_task_completion=False; _gat=1; _ga=GA1.2.1688886003.1471911953; ffo=true
The first and second lines contain most of the information we talked about above:
The final line contains information about the client-side cookies - you can see in this case the cookie includes an id for managing sessions (Cookie: sessionid=6ynxs23n521lu21b1t136rhbv7ezngie; ...).
The remaining lines contain information about the browser used and the sort of responses it can handle. For example, you can see here that:
HTTP requests can also have a body, but it is empty in this case.
The responseThe first part of the response for this request is shown below. The header contains information like the following:
At the end of the message we see the body content - which contains the actual HTML returned by the request.
HTTP/1.1 200 OK Server: Apache X-Backend-Server: developer1.webapp.scl3.mozilla.com Vary: Accept,Cookie, Accept-Encoding Content-Type: text/html; charset=utf-8 Date: Wed, 07 Sep 2016 00:11:31 GMT Keep-Alive: timeout=5, max=999 Connection: Keep-Alive X-Frame-Options: DENY Allow: GET X-Cache-Info: caching Content-Length: 41823 (function(d) { d.className = d.className.replace(/\bno-js/, ""); })(document.documentElement); ...
The remainder of the response header includes information about the response (e.g. when it was generated), the server, and how it expects the browser to handle the page (e.g. the X-Frame-Options: DENY line tells the browser not to allow this page to be embedded in an in another site).
POST request/response exampleAn HTTP POST is made when you submit a form containing information to be saved on the server.
The requestThe text below shows the HTTP request made when a user submits new profile details on this site. The format of the request is almost the same as the GET request example shown previously, though the first line identifies this request as a POST .
1 Host: developer.mozilla..0 (Windows NT 10.0; WOW64) AppleWebKit/537.36 (KHTML, like Gecko) Chrome/52.0.2743.116 Safari/537.36 Content-Type: application/x-www-form-urlencoded Accept: text/html,application/xhtml+xml,application/xml;q=0.9,image/webp,*/*;q=0..8,es;q=0.6 Cookie: sessionid=6ynxs23n521lu21b1t136rhbv7ezngie; _gat=1; csrftoken=zIPUJsAZv6pcgCBJSCj1zU6pQZbfMUAT; dwf_section_edit=False; dwf_sg_task_completion=False; _ga=GA1.2.1688886003.1471911953; ffo=true csrfmiddlewaretoken=zIPUJsAZv6pcgCBJSCj1zU6pQZbfMUAT&user-username=hamishwillee&user-fullname=Hamish+Willee&user-title=&user-organization=&user-location=Australia&user-locale=en-US&user-timezone=Australia%2FMelbourne&user-irc_nickname=&user-interests=&user-expertise=&user-twitter_url=&user-stackoverflow_url=&user-linkedin_url=&user-mozillians_url=&user-facebook_url=
The main difference is that the URL doesn"t have any parameters. As you can see, the information from the form is encoded in the body of the request (for example, the new user fullname is set using: &user-fullname=Hamish+Willee).
The responseThe response from the request is shown below. The status code of " 302 Found " tells the browser that the post succeeded, and that it must issue a second HTTP request to load the page specified in the Location field. The information is otherwise similar to that for the response to a GET request.
HTTP/1.1 302 FOUND Server: Apache X-Backend-Server: developer3.webapp.scl3.mozilla.com Vary: Cookie Vary: Accept-Encoding Content-Type: text/html; charset=utf-8 Date: Wed, 07 Sep 2016 00:38:13 GMT Location: https://сайт/en-US/profiles/hamishwillee Keep-Alive: timeout=5, max=1000 Connection: Keep-Alive X-Frame-Options: DENY X-Cache-Info: not cacheable; request wasn"t a GET or HEAD Content-Length: 0
Note : The HTTP responses and requests shown in these examples were captured using the Fiddler application, but you can get similar information using web sniffers (e.g. Websniffer) or browser extensions like HttpFox . You can try this yourself. Use any of the linked tools, and then navigate through a site and edit profile information to see the different requests and responses. Most modern browsers also have tools that monitor network requests (for example, the Network Monitor tool in Firefox).
Static sitesA static site is one that returns the same hard coded content from the server whenever a particular resource is requested. So for example if you have a page about a product at /static/myproduct1.html , this same page will be returned to every user. If you add another similar product to your site you will need to add another page (e.g. myproduct2.html) and so on. This can start to get really inefficient - what happens when you get to thousands of product pages? You would repeat a lot of code across each page (the basic page template, structure, etc.), and if you wanted to change anything about the page structure - like add a new "related products" section for example - then you"d have to change every page individually.
Note : Static sites are excellent when you have a small number of pages and you want to send the same content to every user. However they can have a significant cost to maintain as the number of pages becomes larger.
Let"s recap on how this works, by looking again at the static site architecture diagram we looked at in the last article.
When a user wants to navigate to a page, the browser sends an HTTP GET request specifying the URL of its HTML page. The server retrieves the requested document from its file system and returns an HTTP response containing the document and an HTTP Response status code of " 200 OK " (indicating success). The server might return a different status code, for example " 404 Not Found " if the file is not present on the server, or " 301 Moved Permanently " if the file exists but has been redirected to a different location.
The server for a static site will only ever need to process GET requests, because the server doesn"t store any modifiable data. It also doesn"t change its responses based on HTTP Request data (e.g. URL parameters or cookies).
Understanding how static sites work is nevertheless useful when learning server-side programming, because dynamic sites handle requests for static files (CSS, JavaScript, static images, etc.) in exactly the same way.
Dynamic sitesA dynamic site is one that can generate and return content based on the specific request URL and data (rather than always returning the same hard-coded file for a particular URL). Using the example of a product site, the server would store product "data" in a database rather than individual HTML files. When receiving an HTTP GET Request for a product, the server determines the product ID, fetches the data from the database, and then constructs the HTML page for the response by inserting the data into an HTML template. This has major advantages over a static site:
Using a database allows the product information to be stored efficiently in an easily extensible, modifiable, and searchable way.
Using HTML templates makes it very easy to change the HTML structure, because this only needs to be done in one place, in a single template, and not across potentially thousands of static pages.
Anatomy of a dynamic requestThis section provides a step-by-step overview of the "dynamic" HTTP request and response cycle, building on what we looked at in the last article with much more detail. In order to "keep things real" we"ll use the context of a sports-team manager website where a coach can select their team name and team size in an HTML form and get back a suggested "best lineup" for their next game.
The diagram below shows the main elements of the "team coach" website, along with numbered labels for the sequence of operations when the coach accesses their "best team" list. The parts of the site that make it dynamic are the Web Application (this is how we will refer to the server-side code that processes HTTP requests and returns HTTP responses), the Database , which contains information about players, teams, coaches and their relationships, and the HTML Templates .

After the coach submits the form with the team name and number of players, the sequence of operations is:
An operation to update a record in the database would be handled similarly, except that like any database update, the HTTP request from the browser should be encoded as a POST request.
Doing other workA Web Application"s job is to receive HTTP requests and return HTTP responses. While interacting with a database to get or update information are very common tasks, the code may do other things at the same time, or not interact with a database at all.
A good example of an additional task that a Web Application might perform would be sending an email to users to confirm their registration with the site. The site might also perform logging or other operations.
Returning something other than HTMLServer-side website code does not have to return HTML snippets/files in the response. It can instead dynamically create and return other types of files (text, PDF, CSV, etc.) or even data (JSON, XML, etc.).
The idea of returning data to a web browser so that it can dynamically update its own content (AJAX) has been around for quite a while. More recently "Single-page apps" have become popular, where the whole website is written with a single HTML file that is dynamically updated when needed. Websites created using this style of application push a lot of computational cost from the server to the web browser, and can result in websites that appear to behave a lot more like native apps (highly responsive, etc.).
Web frameworks simplify server-side web programmingServer-side web frameworks make writing code to handle the operations described above much easier.
One of the most important operations they perform is providing simple mechanisms to map URLs for different resources/pages to specific handler functions. This makes it easier to keep the code associated with each type of resource separate. It also has benefits in terms of maintenance, because you can change the URL used to deliver a particular feature in one place, without having to change the handler function.
For example, consider the following Django (Python) code that maps two URL patterns to two view functions. The first pattern ensures that an HTTP request with a resource URL of /best will be passed to a function named index() in the views module. A request that has the pattern " /best/junior ", will instead be passed to the junior() view function.
# file: best/urls.py # from django.conf.urls import url from . import views urlpatterns = [ # example: /best/ url(r"^$", views.index), # example: /best/junior/ url(r"^junior/$", views.junior), ]
Note : The first parameters in the url() functions may look a bit odd (e.g. r"^junior/$") because they use a pattern matching technique called "regular expressions" (RegEx, or RE). You don"t need to know how regular expressions work at this point, other than that they allow us to match patterns in the URL (rather than the hard coded values above) and use them as parameters in our view functions. As an example, a really simple RegEx might say "match a single uppercase letter, followed by between 4 and 7 lower case letters."
The web framework also makes it easy for a view function to fetch information from the database. The structure of our data is defined in models, which are Python classes that define the fields to be stored in the underlying database. If we have a model named Team with a field of "team_type " then we can use a simple query syntax to get back all teams that have a particular type.
The example below gets a list of all teams that have the exact (case sensitive) team_type of "junior" - note the format: field name (team_type) followed by double underscore, and then the type of match to use (in this case exact). There are many other types of matches and we can daisy chain them. We can also control the order and the number of results returned.
#best/views.py from django.shortcuts import render from .models import Team def junior(request): list_teams = Team.objects.filter(team_type__exact="junior") context = {"list": list_teams} return render(request, "best/index.html", context)
After the junior() function gets the list of junior teams, it calls the render() function, passing the original HttpRequest , an HTML template, and a "context" object defining the information to be included in the template. The render() function is a convenience function that generates HTML using a context and an HTML template, and returns it in an HttpResponse object.
Obviously web frameworks can help you with a lot of other tasks. We discuss a lot more benefits and some popular web framework choices in the next article.
SummaryAt this point you should have a good overview of the operations that server-side code has to perform, and know some of the ways in which a server-side web framework can make this easier.
In a following module we"ll help you choose the best Web Framework for your first site.
Лабораторная работа №1
«Создание простейшего HTML-документа. Форматирование текста»
Цель работы
Изучить структуру html-документа, основные тэги форматирования текста и использовать их при создании веб-страницы.
Основы создания Web-страниц средствами
Языка разметки гипертекста HTML
Создание простого документа
Основой разработки веб-страниц является язык HTML (HyperText Markup Language – язык разметки гипертекстов).
Основной структурной единицей языка HTML является тег (от англ. Tag - дескриптор, маркер ). Тег всегда заключен между скобками < > и имеет следующий вид:
Теги бывают одиночными и контейнерными. Контейнером называется пара: открывающий и закрывающий .
Открывающий тег служит для указания программе-браузеру начала какого-либо объекта или задания свойств объектов помещенных в контейнер. Закрывающий тег служит для указания программе-браузеру о конце объекта или окончания применения свойств, заданных в открывающем теге.
Атрибуты тега задают значения свойств данного объекта или объектов помещенных в контейнер.
Документ HTML начинается открывающим тегом и заканчивается закрывающим тегом . Между данной парой контейнерных тегов располагаются две другие основные части HTML документа: заголовок, заключенный в контейнер ... и тело документа в контейнере ... (содержание страницы). В разделе описания заголовка можно указать заглавие документа, для этого используется тэг ... (имя страницы).
Таким образом, структура простого HTML документа выглядит примерно так:
{начало страницы}
{описание страницы, заголовка}
название {имя страницы}
{закрытый тэг описания заголовка}
{содержание страницы}
текст
{закрытый тэг описания страницы}
{конец страницы}
Форматирование текста
- тег, определяющий границы тела документа.
Атрибуты:
BGCOLOR – определяет цвет фона документа. По умолчанию «White» (#FFFFFF).
TEXT – задает цвет текста для всей страницы. Цвет указывается в формате RGB или константами red, green, blue и т.п. По умолчанию «black» (#000000).
В таблице 1 приведены названия цветов, определенные в стандарте HTML 4 и соответствующие им RGB-коды. Отметим, что многие современные браузеры выходят за рамки стандартов и поддерживают гораздо больше названий цветов.
Таблица 1
| Название | Код | Название | Код |
| Aqua | #00FFFF | navy | #000080 |
| Black | #000000 | olive | #808000 |
| Blue | #0000FF | purple | #800080 |
| Fuchsia | #FF00FF | red | #FF0000 |
| Gray | #808080 | silver | #C0C0C0 |
| Green | #008000 | teal | #008080 |
| Lime | #00FF00 | white | #FFFFFF |
| Maroon | #800000 | yellow | #FFFF00 |
Атрибуты:
ALIGN – выравнивание. Возможные значения: RIGHT-выравнивание текста по правому краю; CENTER - по центру; LEFT - по левому краю; JUSTIFY – по ширине.
… - заголовки разного уровня (от первого до шестого).
Заголовок второго уровня с выравниванием по центру.
Атрибуты:
ALIGN – выравнивание.
WIDTH – длина линии в процентах от окна браузера или пикселях
SIZE – ширина линии в процентах от окна браузера или пикселях
COLOR – цвет линии.
Дополнительные возможности по форматированию:
Полужирный текст;
- курсивный текст;
- эффект подчёркивания;
- эффект зачеркивания.
- используется для указания начертания шрифта в документе.
Атрибуты:
SIZE – размер шрифта.
COLOR – цвет шрифта.
FACE – гарнитура шрифта.
Красная строка набрана шрифтом ARIAL 4 размера
Создание списков
В HTML-документе существует четыре основных вида списков:
Фрагмент текста, представляющий список, заключается в тэги:
Упорядоченный список (ordered list);
Неупорядоченный список (unordered list);
< LI>…. вложенные списки;
…. список определений.
Список определений служит для создание списков типа «термин» - «описание». Каждый термин начинается тэгом , а описание - тэгом .
Каждый элемент списка заключается в тэги
Тэг может иметь параметры:
TYPE= определяет вид нумерации, START= задаёт начальное значение первого элемента списка (независимо от типа указывается цифрой).
TYPE=A – маркеры в виде прописных латинских букв;
TYPE=a – маркеры в виде строчных латинских букв;
TYPE=I – маркеры в виде больших римских цифр;
TYPE=i – маркеры в виде маленьких римских цифр;
TYPE=1 – маркеры в виде арабских цифр (по умолчанию).
Тэг
Тип тэга
Тэг
или
TYPE Вид маркера (см.
VALUE=n Значение для элемента пронумерованного списка (его номер). Все дальнейшие номера элементов списка будут отсчитываться от этого номера.
Создание документа HTML в текстовом редакторе Блокнот
Для того чтобы создать документ HTML в текстовом редакторе Блокнот необходимо выполнить следующие действия:
1. Запустить текстовый редактор Блокнот (Пуск > Программы > Стандартные > Блокнот).
2. Создать типовую структуру HTML - документа и ввести текст.
Рис. 1. Создание HTML - документа в текстовом редакторе Блокнот
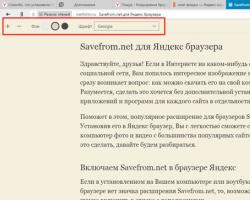
4. Закрыть блокнот. Найти файл first.html и открыть его с помощью интернет-браузера.

Рис. 2. Иллюстрация документа в интернет-браузере.
HTML - это язык разметки сайта. Многие считают его программированием, но это не так. В HTML нет никаких переменных, вычислений, массивов и других элементов, присутствующих в любом языке программирования.
Пользуясь HTML, разработчик может создать только внешний вид сайта. Важно понимать, что ни один сайт не существует без разметки. HTML является базой создания веб-страниц. Весь остальной функционал добавляется различными языками программирования.
Создание html-документаСоздать простую страничку сайта можно в любом редакторе. Подойдет даже "Блокнот". Для начинающего разработчика рекомендуется использовать другие редакторы, у которых есть функции автоподстановки и другие подсказки. Благодаря этому можно создавать готовые таблицы, ссылки, изображения и другие элементы. А в "Блокноте" каждую букву приходится писать вручную.
Как правило, "Блокнот" используют только в тех случаях, когда под рукой нет других инструментов. Сначала создается текстовый документ, а потом сохраняется в формате html. Все страницы сайта должны быть с расширением html.
Язык html является иерархичным. То есть существует специальная структура html-документа. Что это такое? Рассмотрим ниже для наглядности.
Структура html-документа. ПримерСтруктура всегда одна и та же. Если вы захотите поменять что-то, браузер не сможет это обработать. В результате вы не получите то, что задумали.
На рисунке выше указана структура любого html-файла. Первый пункт указывает на тип файла. Этот тег указывается один раз. Если вы будете использовать специальные редакторы, то вся структура создастся автоматически. Вам нужно будет подправить стандартные значения.
Структура html-документа - основные теги:
Из этих трех тегов состоит каркас всего сайта. Обратите внимание на рисунок. Все эти теги имеют закрывающийся тег со знаком “/”. Если вы пишете от руки, привыкайте ставить сразу оба тега - открывающий и закрывающий.
Выше было сказано, что страницы сайтов имеют расширение.html. То есть если вы создадите текстовый документ, но при этом напишете правильный код, браузер всё равно отобразит вам просто текст. Никакого преобразования кода не будет.
Раздел headНа рисунке под пунктом 3 указан раздел head. В этом разделе указывается служебная информация. Например, можно указать кодировку (пункт 4) и заголовок страницы (пункт 5).
Заголовок должен быть всегда. Без него ни один поисковик не сможет определить название контента (текста) на веб-странице. А это плохо для продвижения сайта. Более того, в браузере наверху не будет указан заголовок страницы. Это неудобство для пользователя.
Структура html-документа такова, что указывается только в разделе head. Если тег указать в разделе body или после него, то обработчик на него не обратит внимания.
Кроме этого, в разделе head указывается информация для подключения скриптов, файлов стилей, инструкции для поисковых систем или любые другие данные, которые пользователь не должен видеть, но они важны для браузера или программистов.
Подключение стилейСтруктура html-документа позволяет подключать стили различными способами. Более того, их можно писать индивидуально в каждом элементе. Но данный способ не рекомендуется, поскольку код становится слишком большим и неудобным.
Подключается файл следующим образом.
В атрибуте href указывается путь до файла. Если в пути будет ошибка, то стили не загрузятся. Также обязателен атрибут type, который указывает, что это файл css.
Другим вариантом является определение стилей прямо в разделе head.

Но этот вариант также не очень рекомендуется. Эти методы сильно отличаются тем, что файл css может быть одним для всего сайта, и все изменения в нем будут мгновенно применяться ко всем страницам. А если вы используете метод, который указан на рисунке выше, то вам придется вносить изменения во все существующие страницы сайта.
Если создаваемый класс будет использоваться только на одной странице, тогда этот вариант вам подходит.
Подключение скриптовСкрипты подключаются следующим образом.
Здесь обязательны два атрибута: type и src. В первом указываем, что это файл Javascript, а второй - где расположен файл. Если вы допустите опечатку, то ничего работать не будет.
Раздел bodyСтруктура html-документа такова, что размещать содержание, которое будет видно пользователю, нужно только в разделе body. Название тега говорит само за себя.
Здесь указывается весь основной код страницы, который может включать неограниченное число элементов. Но чем длиннее код, тем дольше он будет обрабатываться.
Рассмотрим самые основные теги, которые можно использовать в области body. Основных не так много. Все остальные вы будете узнавать по мере роста ваших знаний и практики.
Основные тегиСтруктура html-документа требует обязательного порядка написания элементов. Теги всегда должны по краям обрамляться скобками . Без этого браузер не поймет, что это тег. После открывающейся скобки всегда следует имя элемента (тега). Если вы допустите пробел между < и именем, то браузер посчитает это текстом.
Рассмотрим на примере тега изображения. Обратите внимание, что этот тег не закрывающийся, в отличие от ссылок, абзаца и многих других.

Порядок атрибутов не имеет значения. Но их написание (оформление) очень важно. Всегда сначала идет имя атрибута, потом знак равенства, затем в кавычках пишется значение атрибута. Значение может быть разным - цифровое или текстовое.
Атрибут src во всех тегах указывает путь файла, который нужно подгружать. Атрибут alt во всех элементах указывает короткое описание. В данном случае загружается фотография bird.jpg с описанием - фотография птицы.
Кроме этого, в можно было указать размеры, только ширину или высоту, заголовок, выравнивание, класс стиля или рамку.
Рассмотрим другие основные теги, которые указываются в разделе body.
Назначение |
|
Изображения |
|
Перенос текста на новую строку |
|
… | Жирный текст |
Перечеркнутый текст |
|
Подчеркнутый текст |
|
Начинающие разработчики не всегда сразу могут представить всё это умозрительно. Посмотрите несколько примеров структуры веб-страниц, и тогда вам точно станет понятно.